It’s happened to us all, you’ve forgotten to set the white balance on the camera or the lighting just hasn’t been consistent on the day of the shoot, so now you’re here looking at orange or blue footage.
Well you probably already know there are a lot of ways to fix the white balance; you can try your luck with the numerous auto correctors of your choice or you can dive into the Scopes and manually correct the footage for cleaner, better results.
My preference is always the latter option. Da Vinci Resolve is my weapon of choice today, not only is it incredibly powerful but it is free.
For those new to Scopes I will briefly show you what to look out for and achieve the best white balance possible, we’ll be just looking at the parade view in this tutorial.
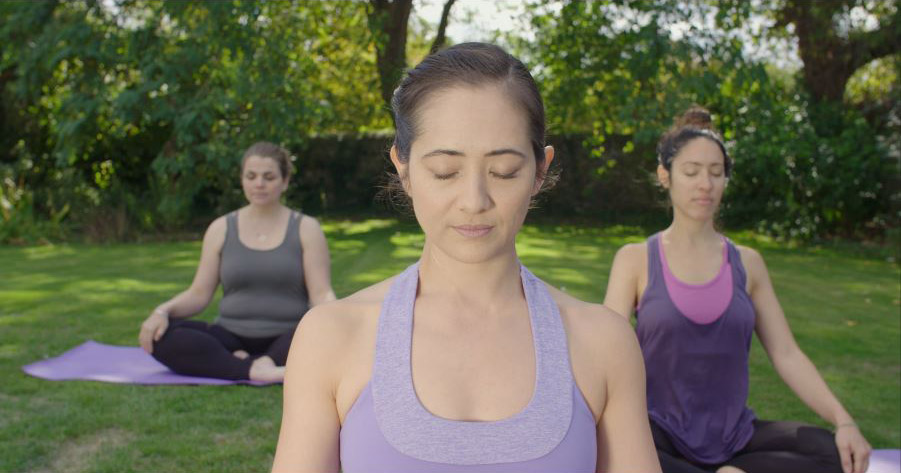
So here’s our example shot (just to let you know I have cheated slightly with these images and increased the temperature in post to give them the look of being incorrectly balanced). The same techniques still apply though!
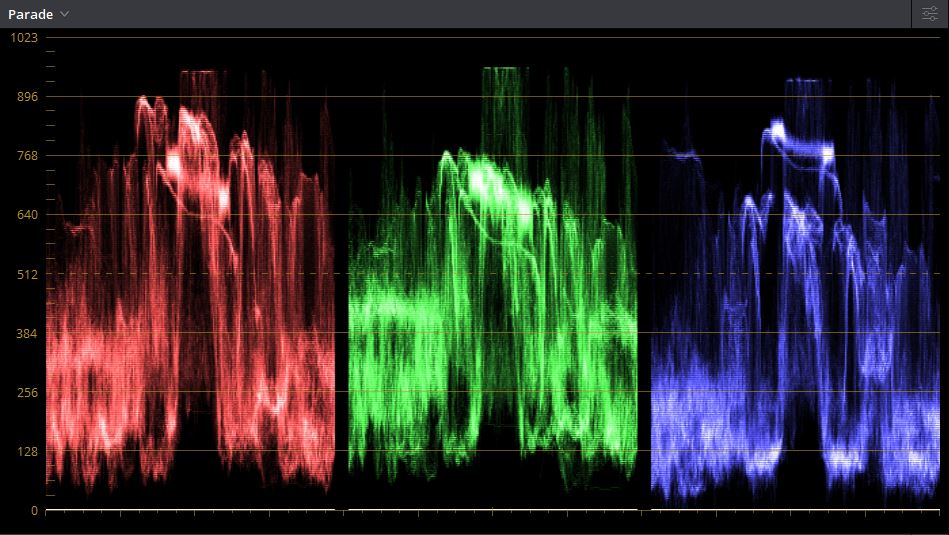
So it’s a bit on the orange side, even if it was a sunny day it just doesn’t look natural.
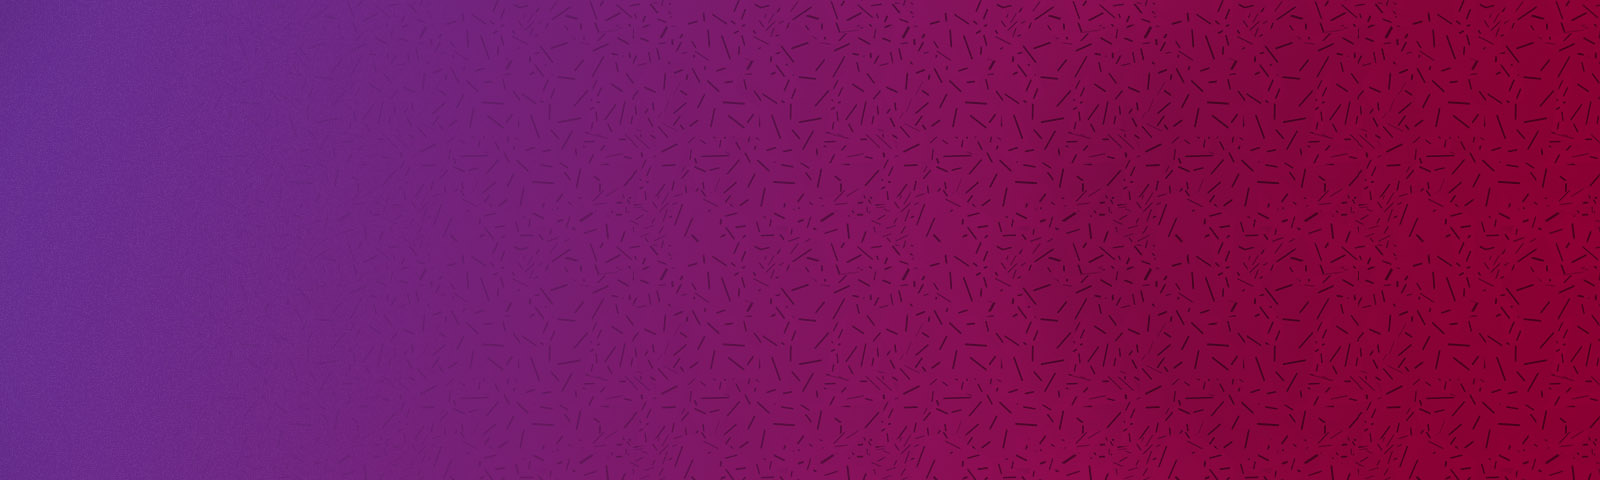
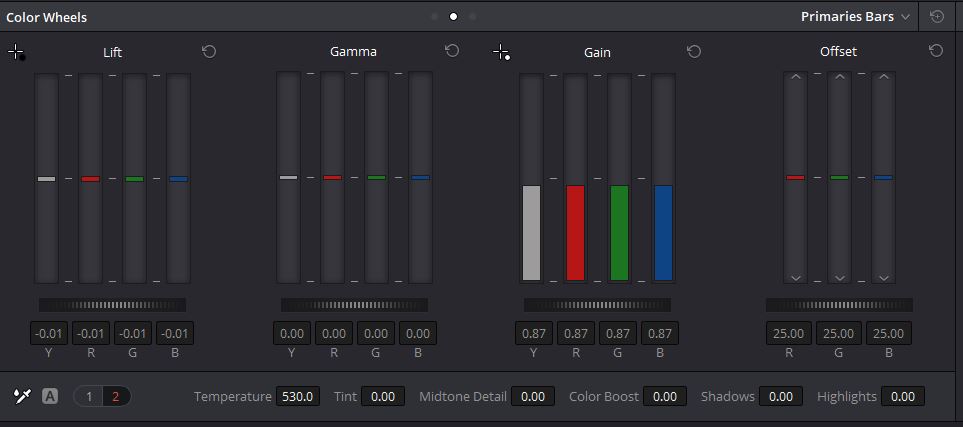
As you can see the red channel is a lot higher than all the other channels. In order to achieve a white balance all three of the channels need to be equal. For maximum control I would recommend using the Primaries Bars in the colour menu of Da Vinci Resolve. Use the sliders to adjust the gain or offset of the channels and manipulate the colours in the Scopes.
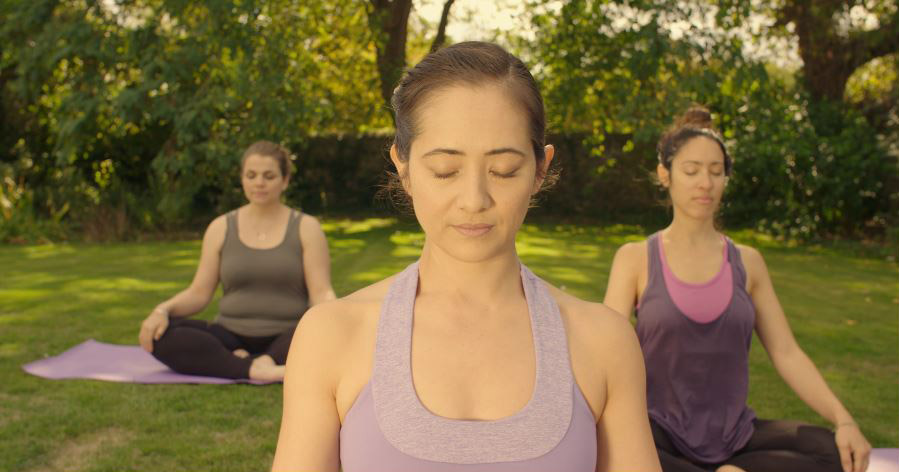
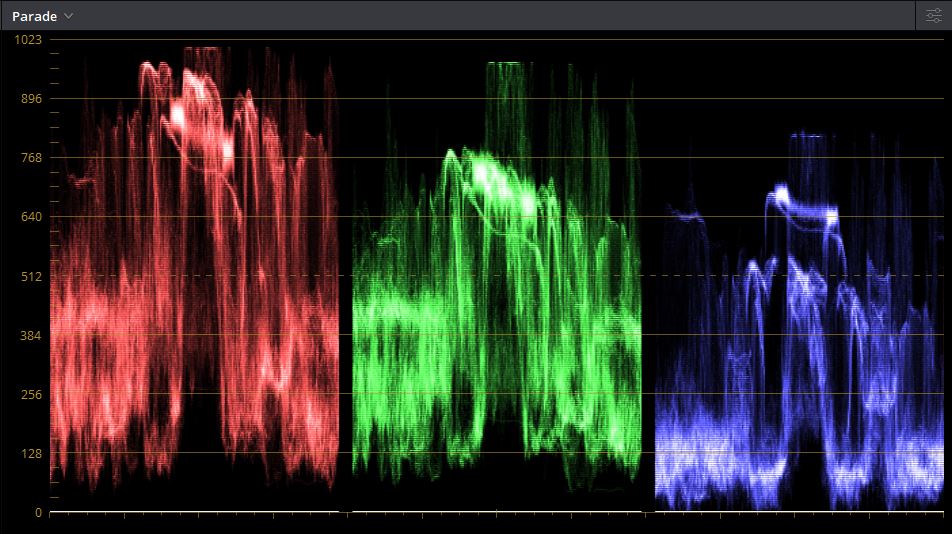
Once you have adjusted all of the channels so they are as close as possible to being equal, you should be left with a pretty good result and footage that doesn’t have an ugly orange tint over it. As you can see the highlights are all now around the same value and the shadows are also very close.
This is just one of the ways you can use resolve to achieve a perfect white balance you could also try using the colour temperature and tint menu at the bottom of the menu or the primaries wheels to adjust the level of colours. The method you choose is up to you but remember to trust the scopes and you will get the desired look after a short amount of time.