
In last week’s blog post we began our introduction into stop-motion animation, covering a brief history. This week, we cover pre-production and more!
Pre-production
Think about what you want to create. For your first animation, you might want to create a test for yourself rather than diving straight into a narrative based video. You want to start somewhere simple and perfect that to your liking first. Try not to bite off more than you can chew because this could result in becoming very frustrated and may lead to you giving up on your first animation. If you find yourself getting frustrated, don’t worry. Stop-motion takes time and concentration. Don’t forget to have fun and enjoy what you are doing. Everyone has to start somewhere and everyone gets better with practice.
If you feel you are ready to begin a short film, you need to begin pre-production. Before you start animating, you will need to create a script. Even if there is no dialogue in your short film, you will need to know what you are going to be shooting. As well as creating a script, you will need to design your own storyboards. You should have every shot sketched out onto paper and a short description of anything that you will need to know for that shot. Normally, such details will consist of frame number, page number, an action description, duration of the shot and camera position+ angle.
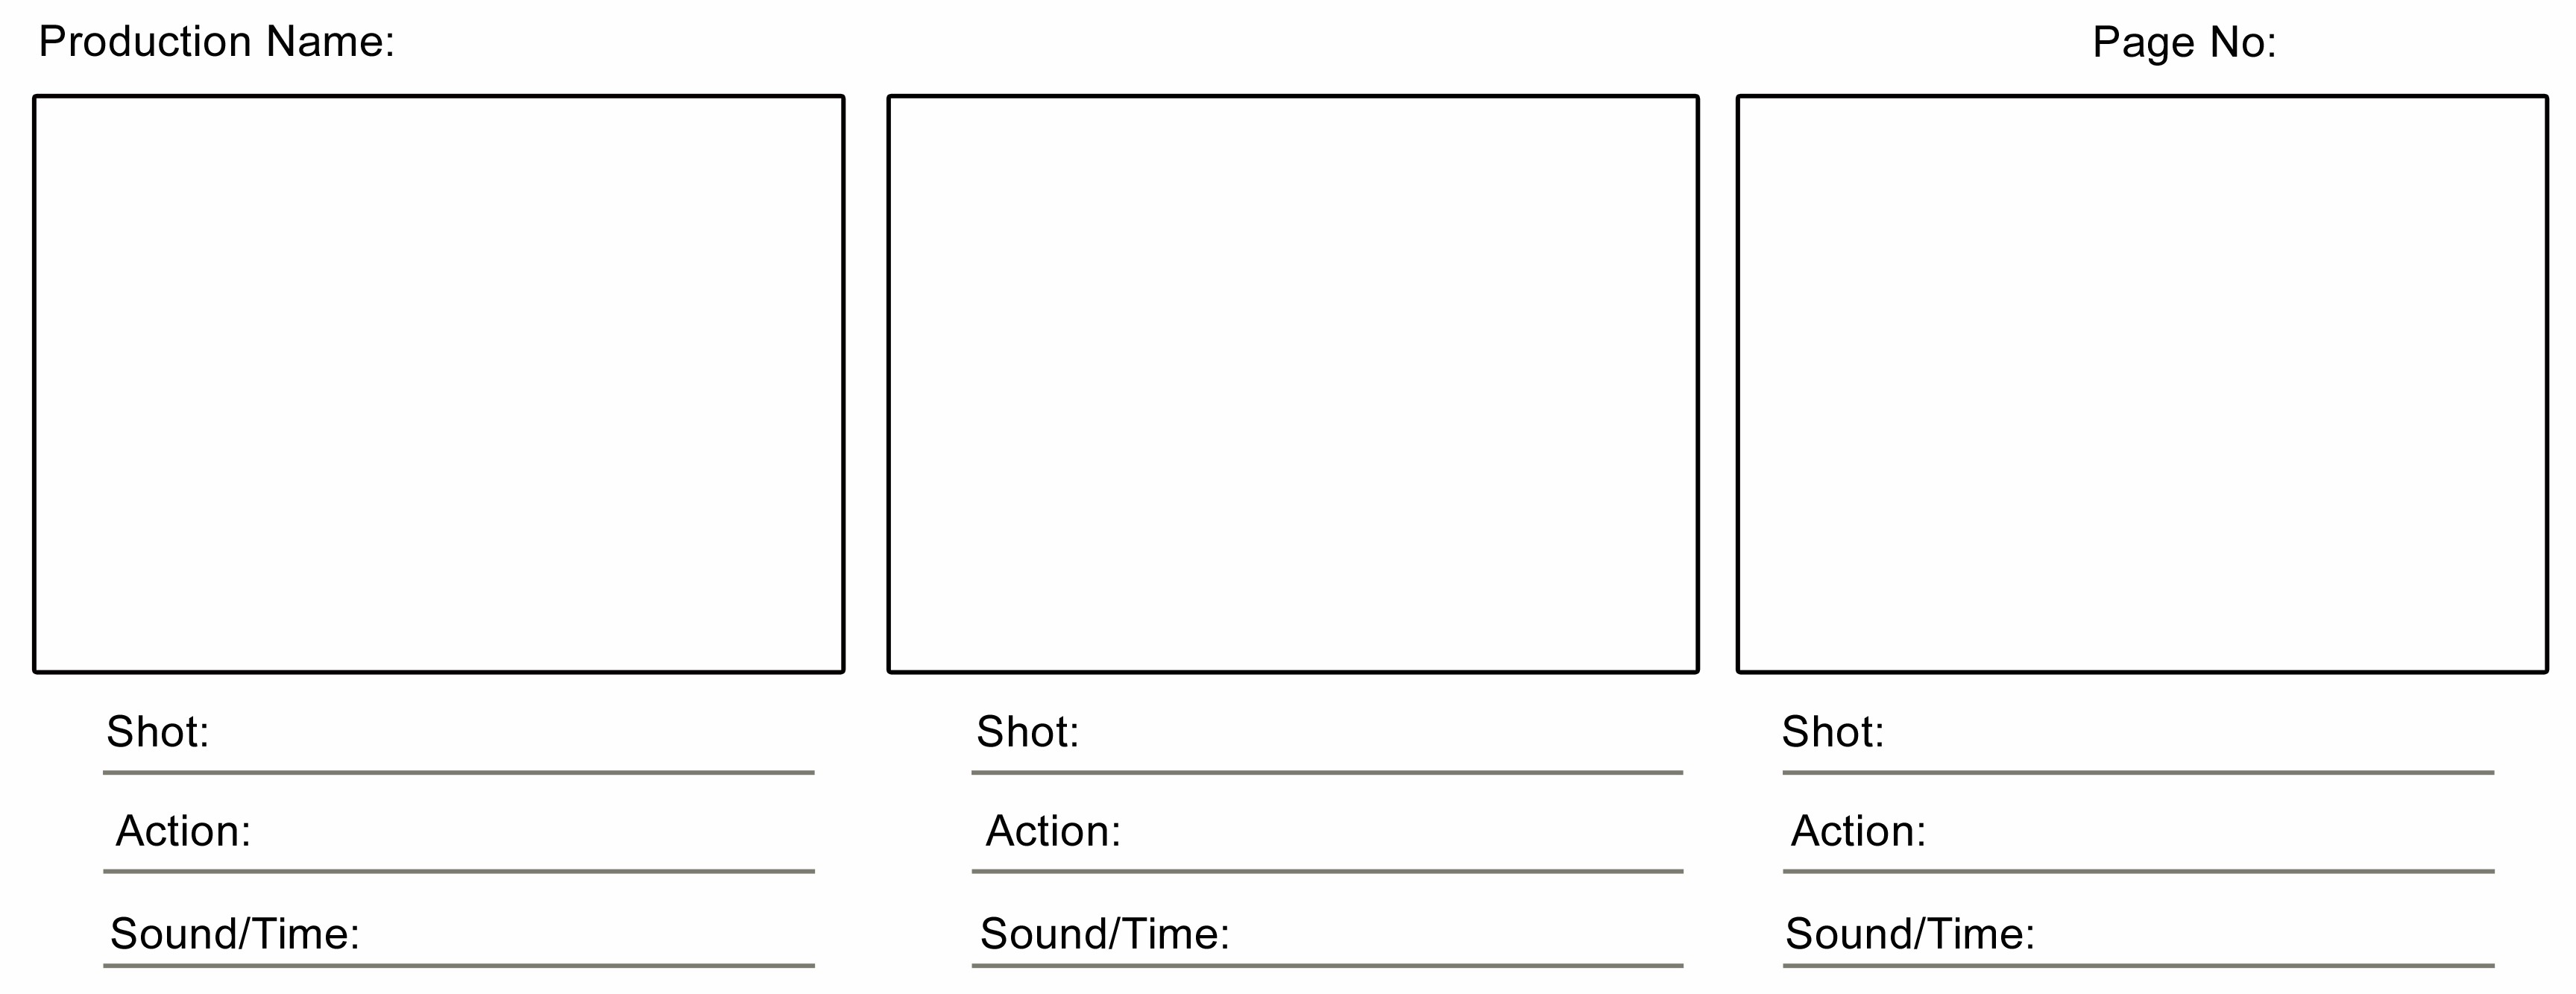
As well as a visual aid, the storyboards are useful for reference and can act as a reminder especially for timing. Don’t worry if your artistic skills are not up to scratch, stick men will be fine. Your storyboards should be clear enough, so that if you were to pass them to someone else, they will know what is happening within the scene and not be confused. Stop-motion takes a long time to animate and capture and you may forget which section is coming next or how long a certain action should take. Don’t forget to take into account any dialogue and practise reading your lines so that you know how long each shot will take.
Building a set
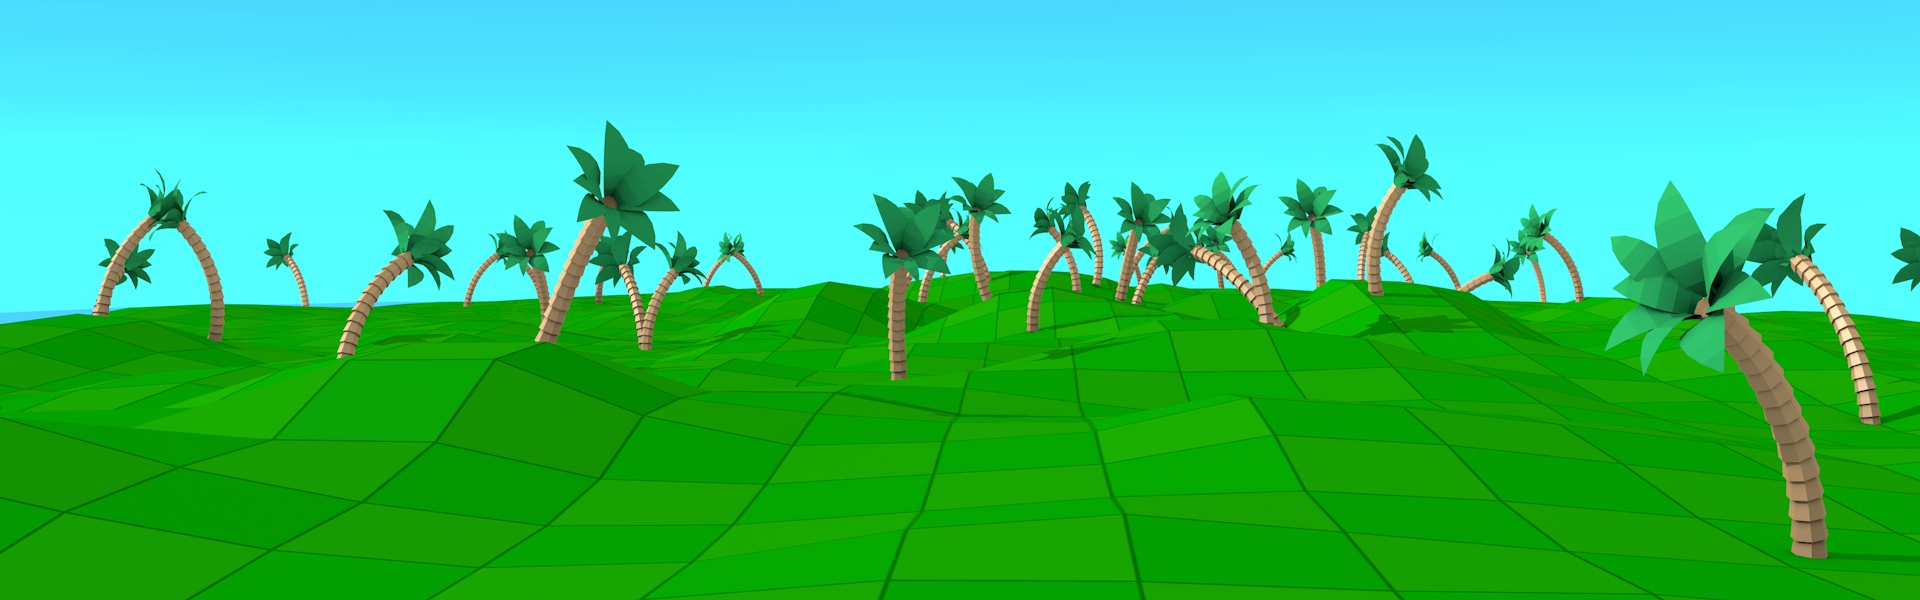
So you may have an idea by now what your character will look like and what he/she will be made from. The next step is to create a set for your character to interact with. For the base of the set you will want to designate a certain area that will not be disturbed during animation. This would normally be a desk or table in amateur stop-motion. Then you can add your own base and start building your set and adding in props. Your set can be made of anything you require. Something that can be cut or bent into size cheaply would be ideal. Plywood is a good material to use, especially for any walls or flat surfaces. This can be built to a custom size; the texture is smooth and can also be painted. If you build your set with walls that can be disassembled, then you will still be able to capture from most angles without your set getting in the way of the camera or the subject you are shooting. For one of my first year university projects I wanted to place my character into a 3D environment. I decided to green screen my character so that the back ground could be keyed out later in editing. With little budget, I bought some A3 luminous green card and placed this on my set and on my background without folding the card. This way, I would have a green floor for my character to walk on and a green background for the environment. If you make sure that you don’t fold your card, this creates an infinity curve (see below), which will make keying out the green card a lot easier when it comes to the post production part of your work.

Materials
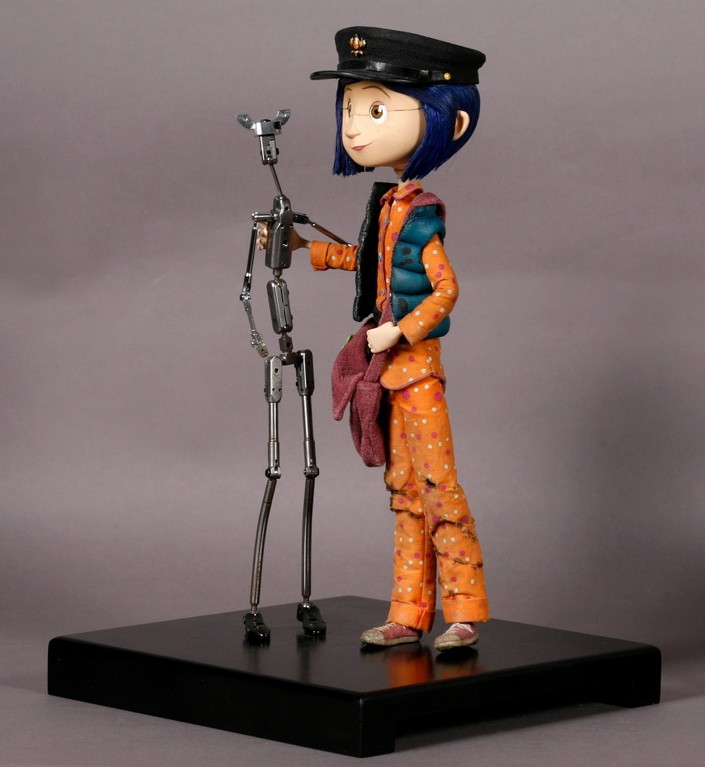
When handling your character, you will want to animate freely, without it falling apart. An armature is a metal skeleton type figure that you can build your character around and it is essential for character stop-motion animation.
Armatures range in price and quality. One option you have is what is known as a ball and socket type armature. This model will vary depending on the amount of money you want to spend. The lower end of the budget will buy you a small model with the minimum amount of joints required to animate. The higher end of the budget will buy a model that is larger in size and will contain more joints to animate with.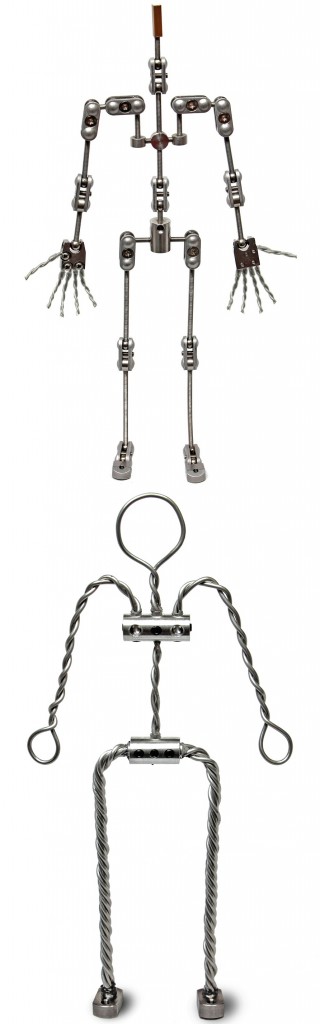
The other option that you have is a wire armature. This version has no joints as such, but is a made up of wire intertwined and this acts as a skeleton to your character that can be bent into shape.
There are a number of resources online where you can find and buy armatures. Please see here for an example where you can buy armatures and more stop-motion equipment. A professional armature will have the ability to be tied down to the base of your set. This, essentially, is like a nut and bolt holding your character down to the floor. If you are not using an armature, make sure your characters feet are quite large in size to support the rest of your characters weight. Depending on the material of your set, use pins in your characters feet to help tie your character down. Think about materials you may need to help build your sets. Clamps are useful for holding your set down and keeping it sturdy. Duct tape and glue will all be used quite often and will be very useful to have available at an arm’s stretch. A small scalpel and sculpting tools will also prove invaluable with the creation of your character. Think of other materials that you could use for your character. For eyes, you can be creative. The way I was shown (and have followed since), is by using a small white glass bead with a tiny hole for the Iris of the eye. Then by using a small pin, you can move the eye position without destroying a part of your model. When creating your props, this would be a good area to use your creativity. If you are up for a challenge then have a go at building your props yourself from whatever you can find. If you are tired or bored of creating tables and chairs, have a go at something a little more creative. Attempt to animate one of the elements. What would your process be to animate fire or water? There is no right or wrong way; I would just say try a few tests and see which process you think is more effective for you.
One of the teaser trailers for Boxtrolls (2014) actually shows the making-of process, which is an unusual approach and underlines the hand-made nature of the animation.
Lip Syncing
If your characters are going to talk, you will need to think about lip syncing. This is one of the more challenging aspects of stop-motion, but I would think about this at pre-production stage as it would have to factor into your timing for your shots when it comes to storyboarding them. As a beginner this may lead to a trial and error process until you are happy with the final output. Lip syncing really adds to an animation and is much more believable on screen rather than animating a mouth just open and close. Consider creating separate mouth pieces to be added or taken away from your character. When we talk, our mouths make certain shapes to pronounce the words we are saying. Animating to a selection of phoneme mouth shapes will make your animation more believable. Phonemes are the basic shapes our mouth makes when we speak. For example when we pronounce F and V, our mouth creates a similar movement. If we pronounced M, B or P, our mouth shape would be different to that of F and V.
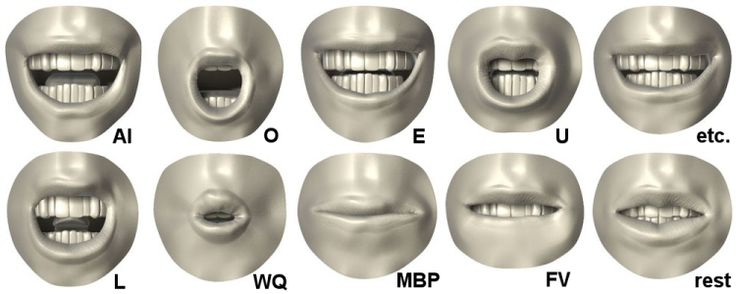
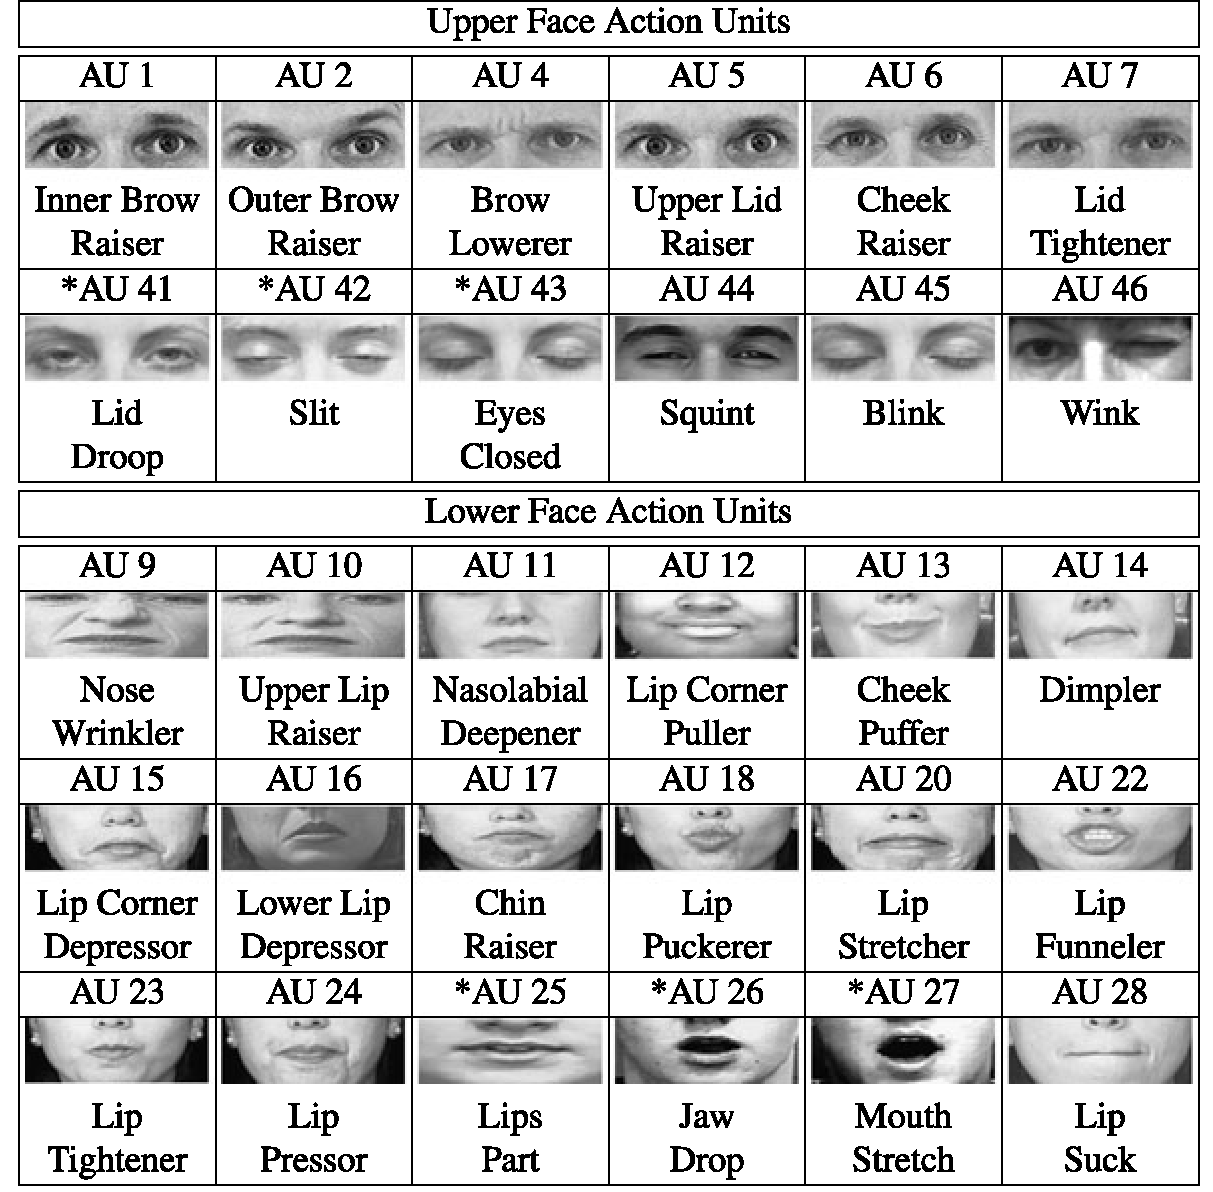
When animating to stop-motion, it’s important to pick out the most pronounced shapes. Adding in a tongue for your character will help express speech. While it is important to lip sync, it’s not completely about the mouth movement. If you think about Wallace and Gromit, we know Gromit doesn’t have a mouth, but yet he is still communicating with us through expressions and we know his current state of emotion. This is also told through the eyes, body language and facial movements of our character. As we speak, we create facial expressions due to our emotions, moods and feelings. Facial Action Encoding System (FACS) is a system that examines and identifies human facial movements based on appearance. Adopted by Paul Ekman, FACS considers all the movements of the individual facial movements. Using FACS, we can code and recreate any facial expression using the labelled Action Unit (AU). Although FACS could be used in a number of different contexts, it’s especially useful to animators.
Although FACS is highly accurate, this can be a very difficult learning curve for beginners. To delve further into FACS or more, you may find microexpressions also interesting. There is a brief moment when people try to conceal how they are feeling that can be shown in a facial expression that we cannot control and show how we are really feeling. This is called a microexpression. Microexpressions explore our emotions but only last 1/25 to 1/15 of a second, whereas a normal expression would usually last between ½ second and 4 seconds.
That covers part 2 of our introduction into stop-motion. Next week, I will cover some of the equipment that you will need to begin your own stop-motion animation, such as cameras and software.